If you’re looking for an easy Halloween activity with a big WOW moment, this fizzy pumpkin science experiment is so much fun!
It uses just a few simple ingredients—baking soda, vinegar, dish soap, and food coloring—but the reaction is anything but boring.
Once we added the vinegar, green bubbly foam started spilling right out of the pumpkin’s mouth. My kids absolutely loved watching it happen!
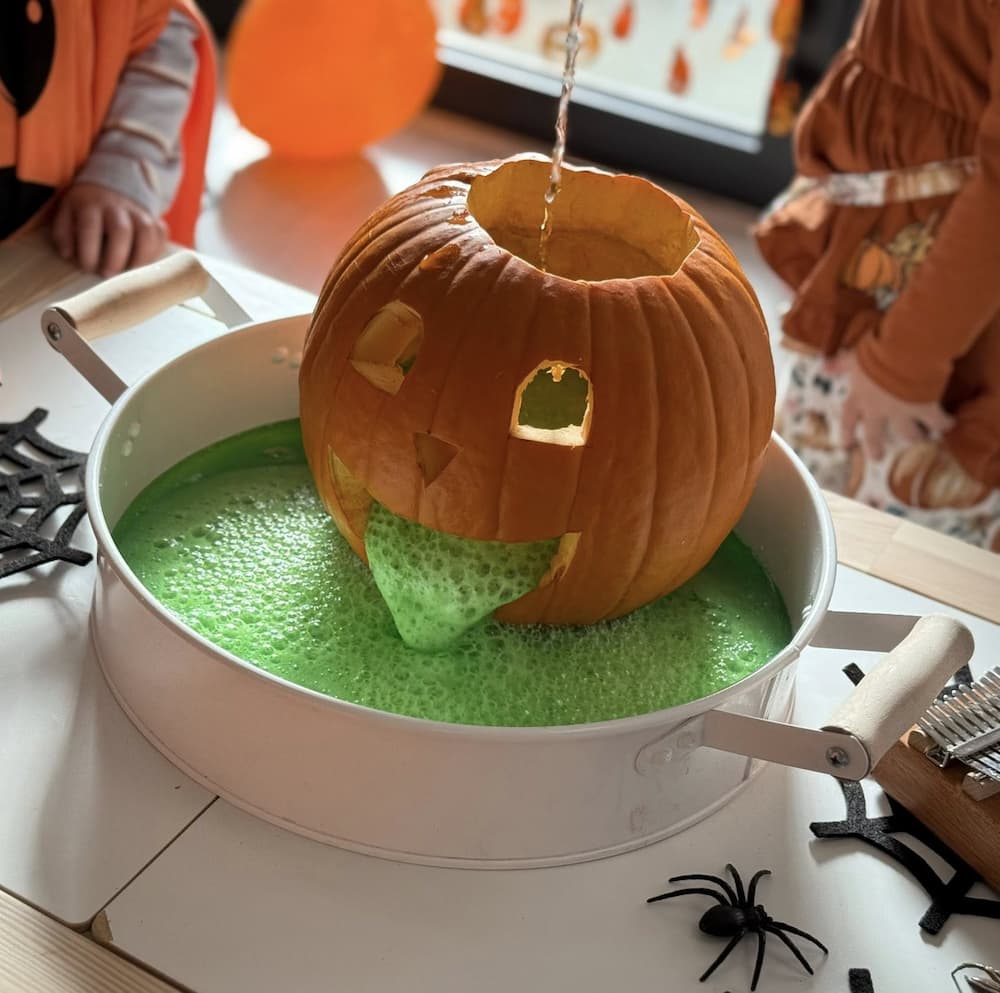
It’s messy, fizzy, hands-on, and such a simple way to bring a little science into your Halloween activities. 🎃
⚠️ A Quick Safety Note
Adult supervision: An adult should handle all pumpkin cutting and carving. Young children should be closely supervised throughout the experiment, and the fizzy mixture is for play only—not for eating.
Once your pumpkin is carved and ready, the kids can join in with the fun part—adding the ingredients and watching the fizzy reaction begin! 🎃🧪
🌸Related Activities You Might Like
Milk and Oil Experiment: A Beautiful Fall Science Activity for Toddlers

🧪 Fizzy Pumpkin Science Fun
I love activities that look exciting but don’t require a long list of special supplies, and this one definitely fits.
Most of what you need comes straight from the kitchen. Add everything to a carved pumpkin, squeeze in the vinegar, and suddenly you have a bubbling Halloween science experiment happening right in front of you.
And honestly, the best part was watching the green foam come pouring out of the pumpkin’s mouth. 😂
My kids wanted to keep adding more baking soda and vinegar just so they could watch the pumpkin erupt again.
If your kids love simple hands-on activities, you can also explore some of our other sensory play activities or try an easy oil and water experiment for another fun way to learn through play.
🛒 What You’ll Need for Your Fizzy Pumpkin
You don’t need much for this experiment:
- 🎃 Small pumpkin
- 🥄 Baking soda
- 🧴 White vinegar
- 💚 Green food coloring
- 🫧 Dish soap
- 💦 Squeeze bottle
- 🥄 Spoon
- Large tray or shallow container
I definitely recommend using a large tray underneath the pumpkin. This activity gets very fizzy and very messy!
🎃 How to Make the Fizzy Pumpkin Experiment
1. Prepare Your Pumpkin
Start by having an adult carefully cut the top off the pumpkin.
Scoop out the inside, then carve a simple Halloween face into the front. Give your pumpkin eyes, a nose, and—most importantly—a nice big mouth.
The mouth is where all that green fizzy foam will eventually come bubbling out!
2. Add the Baking Soda
Add about 4–5 spoonfuls of baking soda to the inside of your pumpkin.
There’s no need to measure it perfectly.
I also recommend keeping some extra baking soda nearby because your kids will probably want to make the pumpkin erupt more than once!
3. Add Green Food Coloring and Dish Soap
Add several drops of green food coloring to the pumpkin.
Then add a few drops of dish soap.
The green food coloring gives you that wonderfully gross Halloween look, while the dish soap helps create lots of thick, foamy bubbles.
4. Prepare the Vinegar
Fill a squeeze bottle with white vinegar.
If you’d like to make your vinegar go a little further, you can dilute it with some water. I used approximately:
2 parts vinegar + 1 part water
Now you’re ready for the fun part!
5. Make Your Pumpkin Fizz! 💚
Let your child squeeze the vinegar into the pumpkin.
And watch!
The baking soda and vinegar will immediately start reacting, creating lots of fizzing and bubbling inside the pumpkin.
Keep adding vinegar and soon the green foam will start making its way toward the pumpkin’s mouth.
Then…
Out comes the green pumpkin “vomit”! 😂🎃
This was definitely my kids’ favorite part.
6. Make It Erupt Again
Once the reaction starts slowing down, you don’t necessarily have to stop.
Add another spoonful of baking soda, a little more green food coloring if needed, and squeeze in more vinegar.
Fizz…bubble…erupt!
You can keep repeating the experiment until you’ve used up your ingredients.
🔬 The Science Behind the Fizzy Pumpkin Experiment
So what’s actually making your pumpkin fizz?
The magic comes from two very ordinary kitchen ingredients: baking soda and vinegar.
Baking soda, or sodium bicarbonate, acts as a base. Vinegar contains acetic acid.
When the two are mixed together, a chemical reaction occurs that produces carbon dioxide gas.
Those carbon dioxide bubbles create the fizzing you can see and hear.
The dish soap makes the effect even more dramatic. It helps trap the gas in lots of little bubbles, creating the thick foam that eventually comes spilling out of your pumpkin.
So while your kids might think they’re simply making a pumpkin vomit green foam, they’re actually watching a chemical reaction happen right in front of them. 🧪
👀 Turn It Into a Simple Science Investigation
You don’t need worksheets or a formal science lesson to make this educational.
While your child is experimenting, try asking simple questions such as:
- What do you think will happen when we add the vinegar?
- What can you hear?
- What happens to the bubbles?
- What happens if we add more baking soda?
- What happens when we add more vinegar?
- Do you think we can make the pumpkin erupt again?
You can even make a prediction before adding the vinegar and then see whether you were right.
It’s an easy way to introduce ideas such as cause and effect, observation, prediction, and chemical reactions while your child is simply having fun.
👋 More Than Just a Science Experiment
One thing I really like about this Halloween activity is how hands-on it is.
Kids can spoon the baking soda, squeeze the bottle, add drops of food coloring, watch the bubbles grow, listen to the fizzing sounds, and talk about everything they see happening.
That makes this activity a fun combination of science and sensory play.
If your child particularly enjoys messy, hands-on activities like this one, you might also like my easy sensory play ideas and homemade sensory recipes using simple ingredients you probably already have at home.
🧹 How Messy Is This Activity?
Mess level: HIGH! 😂
But that’s part of the fun.
I highly recommend putting your pumpkin inside a large tray or shallow container before starting.
Once that green foam begins coming through the mouth, it can spread surprisingly quickly.
The tray catches most of the mess and makes cleanup much easier.
You could also do this experiment outside if the weather is nice.
⭐ How Difficult Is It?
Very easy.
Once an adult has prepared and carved the pumpkin, the actual experiment takes only a few minutes to set up.
That’s exactly the kind of activity I love—simple supplies, minimal preparation, and something exciting for the kids to actually do.
🎃 Why We Loved This Fizzy Pumpkin Experiment
This is one of those activities where the setup is almost ridiculously simple compared with how much excitement it creates.
A pumpkin.
Some baking soda.
Vinegar.
A little dish soap and food coloring.
And suddenly you have green bubbles overflowing everywhere while your kids are asking to do it again. 😂
For me, those are often the best kids’ activities. They don’t require expensive toys or complicated preparation—just a few everyday materials and an opportunity for kids to explore.
If you’re looking for a fun Halloween science experiment for kids, give this fizzy pumpkin a try.
Just don’t forget the tray underneath it!